How to check and change the brake pads of a scooter on your own
Changing the brake pads on a scooter may seem daunting at first. However, with a little patience and the right tips, it is an achievable task, even for those who, like me, are not mechanical experts. If you enjoy DIY and don’t mind getting your hands dirty, this guide is for you.
When to change the brake pads?
You may have heard this before, but I repeat it because it is crucial: effective braking is essential for your safety. So, how do you know if you need to change your brake pads? There are several signs you should not ignore. First, if the friction of the pad is less than 1.5 mm, it’s time to replace them. Additionally, pay attention to symptoms such as a decrease in braking power, a metallic noise when braking, a spongy brake lever, or a decrease in brake fluid level. All of these indicators are signs that you need a change.
Personally, the first time I faced this on my scooter, I noticed a rather alarming metallic noise when braking. This was my first clue, and upon checking, the thinness of my pads confirmed my suspicions. They were ready to be changed.
Selecting the right brake pads
Choosing the right brake pads is a step you should not overlook. Depending on your scooter model, your driving style, and your budget, recommendations may vary significantly. To avoid making a mistake, do not hesitate to ask for the opinion of a specialist. They will guide you to the best option for your motorcycle. Personally, I have always preferred to ask for advice from my trusted mechanic. He knows my scooter and my driving style, which allows him to recommend the most suitable pads.
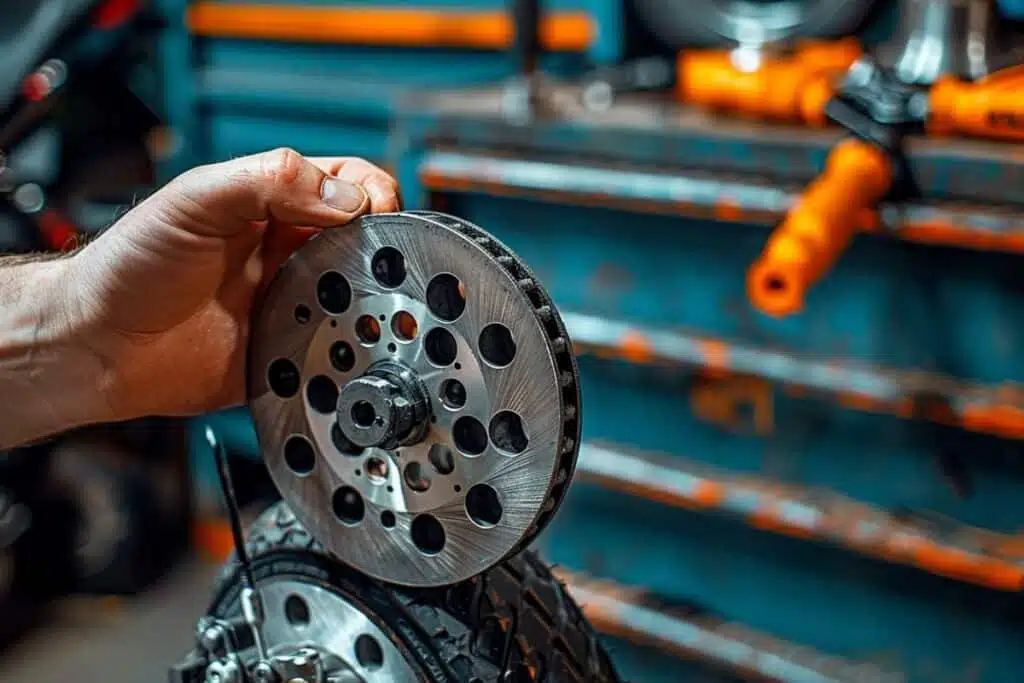
How to change the brake pads?
The process of changing pads may seem complex, but by breaking it down into steps, everything becomes clearer. Before you start, make sure you have all the necessary tools on hand. You’ll need some specific tools such as wrenches to remove the rear wheel, the caliper, and the used pads.
Next, follow these steps:
- Disassembly: Start by removing the exhaust silencer, shock absorber, swingarm, and rear wheel. Often, these parts are secured with screws that you will need to unscrew.
- Accessing the pads: Unscrew the caliper to access the used pads. Remove them and push the pistons to make room for the new pads. Be careful not to activate the brakes when the pads are out.
- Installing the new pads: The new pads come in two parts. Place the first one, then the second, and make sure they are properly aligned with the caliper before tightening the screws.
I still remember the first time I changed the pads on my scooter. I was a bit nervous, fearing I would do something wrong and compromise my safety. But by following the steps methodically, everything went well. And what satisfaction I felt after completing the job!
Reassembly and final checks
Once the new pads are in place, it’s time to reassemble the caliper, rear wheel, and all the other parts in their original positions. Don’t forget to tighten all the screws firmly to ensure the safety of the assembly.
| Step | Action |
|---|---|
| 1 | Reattach the caliper and tighten the support screw |
| 2 | Place the rear wheel and tighten the screws firmly |
| 3 | Screw in the swingarm and secure the safety pin |
| 4 | Replace the shock absorber and the exhaust |
Before getting back on the road, it is crucial to perform a few checks. Activate the brakes several times to ensure good contact between the pads and discs, then recheck the brake fluid level. Remember that new pads need some bedding in: avoid harsh braking during the first 50 kilometers.
By carefully following these tips, your scooter will be ready to face many kilometers with confidence. Don’t wait for signs of wear on the pads to act. As I learned, it’s better to prevent than to regret. And after all, learning to change the brake pads on your scooter is also a way to connect more with your machine and understand its functioning better. Safe travels!